Download the required version.
https://www.microsoft.com/en-us/sql-server/sql-server-editions-express


The Installation Wizard starts the SQL Server Installation Center. To upgrade an existing instance of SQL Server, click Installation in the left-hand navigation area, and then click Upgrade from... previous versions of SQL Server.

Accept the license agreement.

Here you can choose to allow Microsoft updates to pull updates for SQL as well.

In the specify the instance of SQL Server to modify you can choose a specific instance, or in the dropdown combo box, you can also choose to only upgrade shared components.

With the upgrade, it is not possible to change the configured features currently configured by SQL Server 2014. By default it will upgrade all configured features.

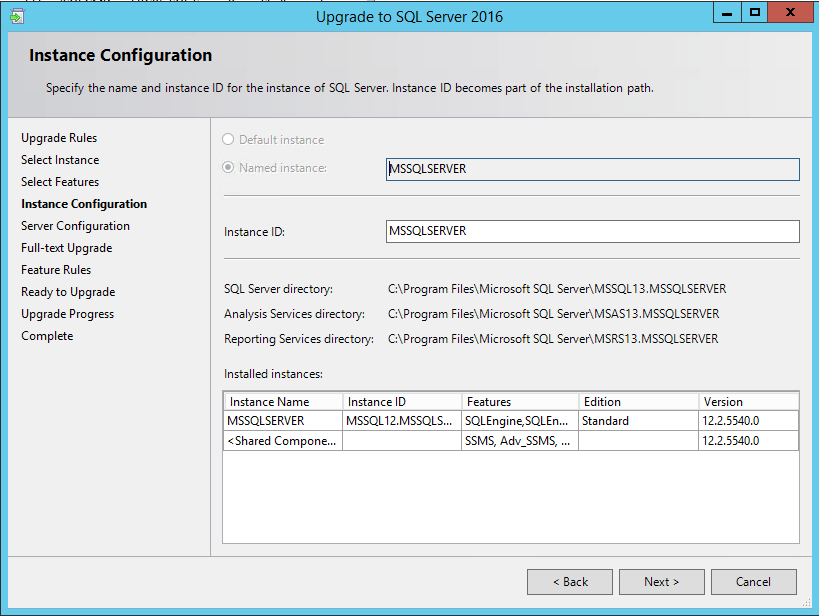
Here you can specify the instance ID for the instance of SQL Server.

Here you can specify the service accounts and collation configuration.

As you can see there are three choices here – Import, Rebuild, and Reset. Since this was a clean installation of SQL Server 2014 that was being upgraded to SQL Server 2016, I chose to Rebuild full-text catalogs using the new and enhanced word breakers. As the installation notes below, rebuilding indexes can take a while, and a significant amount of CPU and memory might be required after the upgrade.

Finally, we come to the Ready to Upgrade screen that displays our configuration choices.

After the upgrade process has completed, you are notified that you need to reboot the server to finish out the process.

You should see Succeeded on all the individual upgrade steps. If not, take a look at the setup log for the upgrade process to begin troubleshooting.