Pre-installation settings before installing Oracle
Database 19c
SELinux
If the OS is to be
used for an Oracle installation, it is easier if Secure Linux (SELinux) is
disabled or switched to permissive. To do this edit the
"/etc/selinux/config" file, making sure the SELINUX flag is set as
follows.
# vi
/etc/selinux/config
SELINUX=permissive
If SELinux is
configured after installation, the server will need a reboot for the change to
take effect.
Firewall
If the OS is to be
used for an Oracle installation, it is easier if the firewall is disabled. This
can be done by issuing the following commands from a terminal window as the
"root" user.
# systemctl stop
firewalld
# systemctl disable
firewalld
You can install and
configure it later if you wish.
SSH
Make sure the SSH
daemon is started using the following commands.
# systemctl start
sshd.service
# systemctl enable
sshd.service
Hosts File
The
"/etc/hosts" file must contain a fully qualified name for the server.
127.0.0.1 localhost localhost.localdomain
localhost4 localhost4.localdomain4
192.168.174.162
oracle19c
Set the correct hostname in the "/etc/hostname" file.
oracle19c
Oracle Installation Prerequisites
Automatic Setup:
Install
"oracle-database-preinstall-19c" package to perform all prerequisite
setup. use the following command
# yum install -y https://yum.oracle.com/repo/OracleLinux/OL7/latest/x86_64/getPackage/oracle-database-preinstall-19c-1.0-1.el7.x86_64.rpm
# yum install -y
oracle-database-preinstall-19c
Manual Setup:
If you have not used
the "oracle-database-preinstall-19c" package to perform all
prerequisites, you have to manually perform the following setup tasks.
The following
packages are listed as required. Don't worry if some don't install. It won't
prevent the installation.
#basic packages to
install
yum install -y bc
yum install -y
binutils
yum install -y
compat-libcap1
yum install -y
compat-libstdc++-33
yum install -y
elfutils-libelf
yum install -y
elfutils-libelf-devel
yum install -y
fontconfig-devel
yum install -y glibc
yum install -y
glibc-devel
yum install -y ksh
yum install -y
libaio
yum install -y
libaio-devel
yum install -y
libdtrace-ctf-devel
yum install -y
libXrender
yum install -y
libXrender-devel
yum install -y
libX11
yum install -y
libXau
yum install -y libXi
yum install -y
libXtst
yum install -y
libgcc
yum install -y
librdmacm-devel
yum install -y
libstdc++
yum install -y
libstdc++-devel
yum install -y
libxcb
yum install -y make
yum install -y
smartmontools
yum install -y
sysstat
#following 4 not
available in oel8
yum install -y
dtrace-modules
yum install -y
dtrace-modules-headers
yum install -y
dtrace-modules-provider-headers
yum install -y
dtrace-utils
#(for Oracle RAC and
Oracle Clusterware)
yum install -y
net-tools
#(for Oracle ACFS)
yum install -y
nfs-utils
#(for Oracle ACFS
Remote)
yum install -y
python
yum install -y
python-configshell
yum install -y
python-rtslib
yum install -y
python-six
yum install -y
targetcli
yum install libstdc*
-y
yum install gcc -y
yum install gcc-c++
-y
yum install
java-11-openjdk-devel
Add the following lines to the
"/etc/sysctl.conf" file, or in a file called
"/etc/sysctl.d/98-oracle.conf".
# vi
/etc/sysctl.conf
fs.file-max =
6815744
kernel.sem = 250
32000 100 128
kernel.shmmni = 4096
kernel.shmall =
1073741824
kernel.shmmax =
4398046511104
kernel.panic_on_oops
= 1
net.core.rmem_default
= 262144
net.core.rmem_max =
4194304
net.core.wmem_default
= 262144
net.core.wmem_max =
1048576
net.ipv4.conf.all.rp_filter
= 2
net.ipv4.conf.default.rp_filter
= 2
fs.aio-max-nr =
1048576
net.ipv4.ip_local_port_range
= 9000 65500
Run one of the following commands to change the
current kernel parameters, depending on which file you edited.
/sbin/sysctl -p
# Or
/sbin/sysctl -p
/etc/sysctl.d/98-oracle.conf
Add the following lines to a file called
"/etc/security/limits.d/oracle-database-preinstall-19c.conf" file.
# vi
/etc/security/limits.d/oracle-database-preinstall-19c.conf
oracle soft
nofile 1024
oracle hard
nofile 65536
oracle soft
nproc 16384
oracle hard
nproc 16384
oracle soft
stack 10240
oracle hard
stack 32768
oracle hard
memlock 134217728
oracle soft
memlock 134217728
Create the new groups and users.
groupadd -g 54321
oinstall
groupadd -g 54322
dba
groupadd -g 54323
oper
groupadd -g 54324
backupdba
groupadd -g 54325
dgdba
groupadd -g 54326
kmdba
groupadd -g 54327
asmdba
groupadd -g 54328
asmoper
groupadd -g 54329
asmadmin
groupadd -g 54330
racdba
useradd -u 54321 -g
oinstall -G dba,oper oracle
usermod -g oinstall
-G oracle oracle
Create the directories in which the Oracle software
will be installed.
mkdir -p
/home/app/oracle/product/19.3/dbhome_1
mkdir -p /home/app/oradata
chown -R
oracle:oinstall /home/app
chmod -R 775
/home/app/oradata
Edit .bash_profile file with oracle user,
vi .bash_profile
export
ORACLE_BASE=/home/app/oracle
export
ORACLE_HOME=/home/app/oracle/product/19.3/dbhome_1
export
GRID_HOME=/home/app/grid
export
ORACLE_UNQNAME=orcl
export
ORACLE_SID=orcl
export
PATH=$ORACLE_HOME/bin:$PATH
save and exit
Download Software:
Download Oracle 19c
database software for Linux x86-64 from Oracle cloud and copy the files to
linux server (on VirtualBox) using winscp or shared folder.

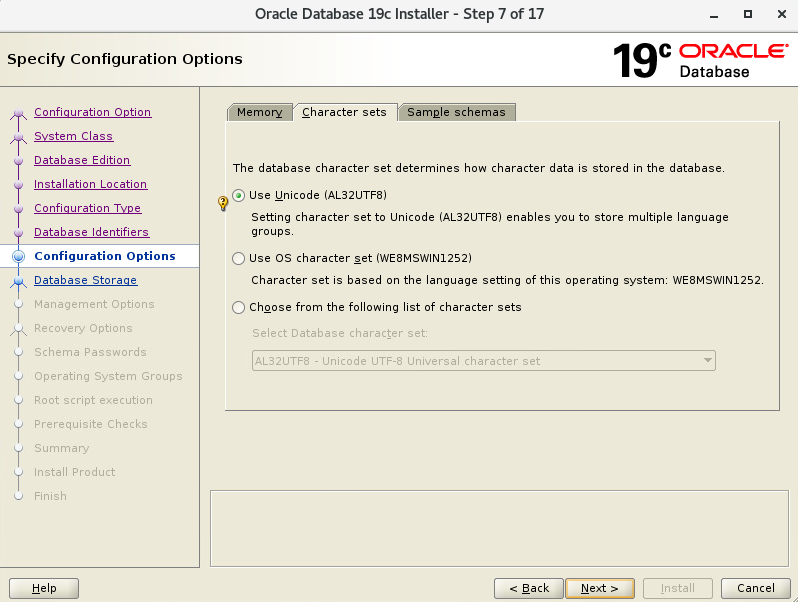
You can choose "Create and configure a
single instance database" option, If you want to install database software

Select
Server class and Next.


Let's go with "Enterprise Edition":

In next screen where we choose the
Oracle base folder:

Select the directory for Oracle base. Notice
that we do not have an option to select Oracle Home and it’s preselected with
the directory where we have extracted software setup.

Select
the type of database that you want.


Register with EM
cloud if you the details or Click on Next.
Oracle Database 12c
is managed by Oracle Database express by default.


Select groups as per requirement and click
NEXT.


Check the installer summary and click on
Install.


Click on close.

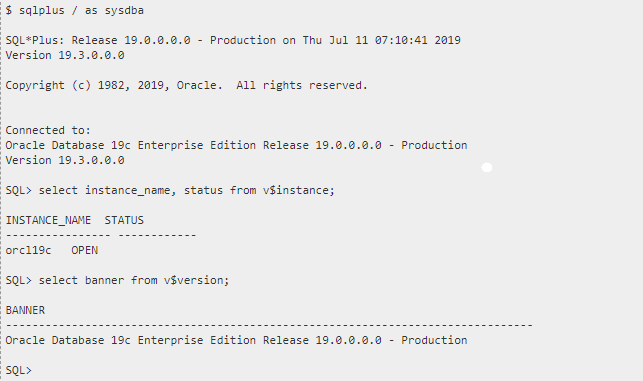
After
successful creation of database check the database status.